

How To Curve Text In Cricut Design Space App
I've been getting a lot of questions on How to Curve Text In Cricut Design Space. So I thought, why not make a tutorial about it? It's super easy to do and there are so many uses for it. I'm so glad that they brought it to Design Space so there's no need to use any extra programs just to curve text.
You might be wondering why you would need this function. There are so many applications for it! It's such a fun way to add a little text detail to your craft project design.
We've added it to a sunshine design but other possibilities include sports images like a baseball, football, basketball, soccer ball, hockey puck, food images like a pizza, donut, or cookie, or other designs like the earth or a rainbow. I bet you'll find even more uses for it!
How to Curve Text In Cricut Design Space
Step by Step Tutorial for Curving Text in Cricut Design Space
1. Select "Upload" (we're using one of our files from Makers Gonna Learn – the Rise and Shine image). Once uploaded, we're going to click "Contour" and hide the "Rise and Shine" image since we only want to use the sun.
To do this, simply click on each letter or image that you want to contour away and you'll see it kind of disappear. Once done, click the X, and you'll be left with with sunshine image without Rise & Shine in it.

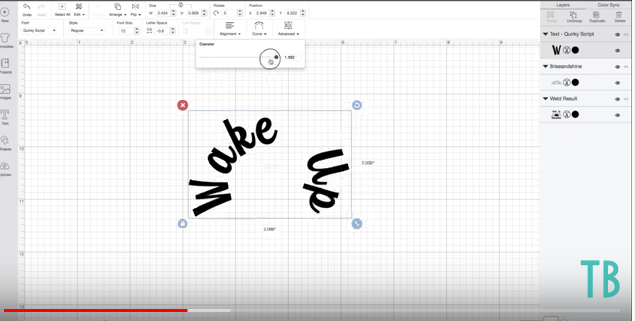
2. Now, we can start designing by selecting "Text" on the left-hand sidebar and typing in "Wake Up".

3. Get the letter spacing down to where you want it. Once you're happy with that, select "Curve" and set the diameter on how much you want to curve the text.
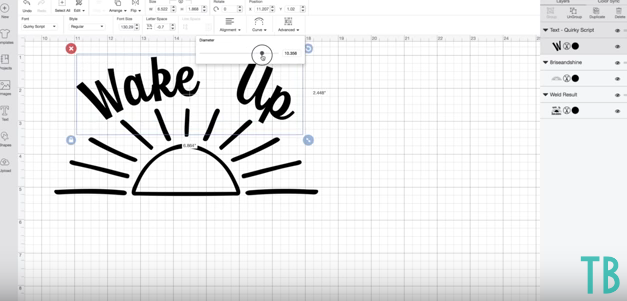
4. Now we'll add it onto our sun. You might have to adjust the letter spacing again once you've added it to your design.
That's how you use the Curve tool in Cricut Design Space. Wasn't that easy? Now we'll complete our image by adding the text Sunshine.
5. Once ready, you can "Weld" your design ready to put on a pillow. Click "Make It", and since we're using Iron-on, don't forget to mirror your image!
6. Select your material as "Iron-on" and load your fine point blade. Cut your Iron-on to size and place it on your mat shiny side down.
7. Once done, load it on your Cricut Maker. Select fast mode on and click on the flashing Cricut button.

8. Once complete, unload it, grab your weeding tool and weed it.

9. Place your pillowcase on to your Easy Press mat and lay down the design that you've made and position it in the center of your pillowcase.

10. Pre-heat your Easy Press to 305 for 30 seconds and press it on your design. Make sure to give evenly distributed pressure.

11. Let it cool, peel it and insert your pillow.
And just like that, we've learned How to Curve Text In Cricut Design Space and we've created an awesome DIY pillow project.

How To Curve Text In Cricut Design Space App
Source: https://makersgonnalearn.com/how-to-curve-text-in-cricut-design-space/
Posted by: pattersoncalk1984.blogspot.com
0 Response to "How To Curve Text In Cricut Design Space App"
Post a Comment